Showing posts with label creative. Show all posts

Friday, November 7, 2014

Emerald on Etsy


There are so many wonderful, time-sucks on the internet these days for us creative types....Etsy, Pinterest, Blogs, Canva (the image above was created in Canva.com , because why not!) PicMonkey, YouTube...the list goes on, and on, and on...as does the time procrastinating. But, it's fun and that's why we do it! 

Last night and today I was admiring some lovely handmade and vintage items on Esty in the wonderful hue of emerald green. Such a rich + bold color. I love it! In fact, I already had a Pinterest board of the same name! Find it here

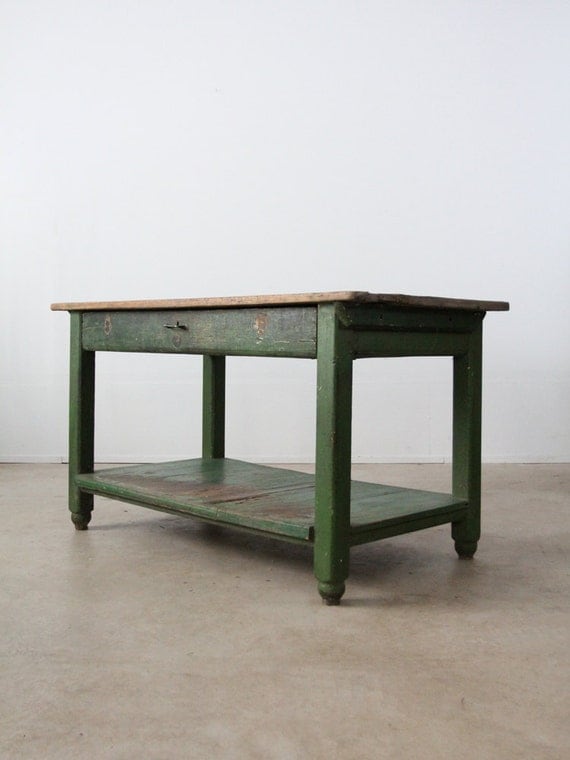
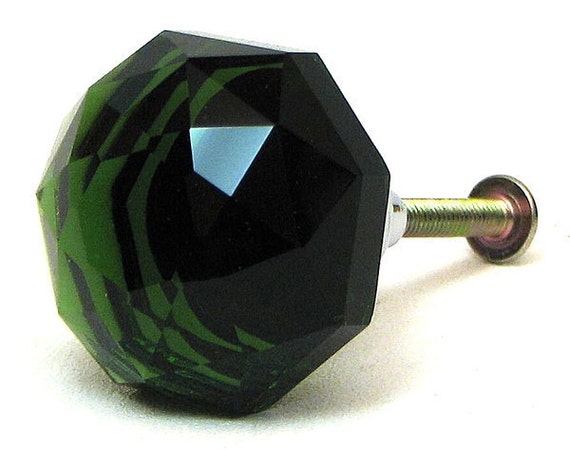
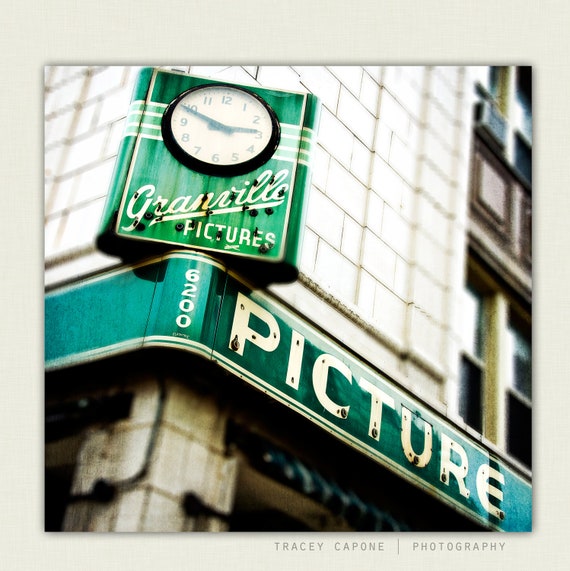
Check out these wonderful vendors on Etsy of both lovely handmade items and curated vintage collections that are all in the lovely, jewel tone of EMERALD GREEN! Click on the link below to see these talented Etsy Shop owners and their offerings. 

vintage work table / rustic painted wood table Emerald Green Drawer Pull Knobs Diamond Cut K9 Crystal Doorknob Cabinet Furniture Hardware Six PackVintage Sign art - Chicago print, emerald green decor -  The Granville - Chicago photography, retro decor, Chicago art, home decor

Have a lovely Friday and a fantastic weekend. Do something creative and take a moment to enjoy the beauty around you! 

Cheers, 


Monday, November 3, 2014

Help from Canva


As we all know, small business ownership requires wearing a bunch of hats. Recently, while donning my marketing hat, I have been using Canva.com to help with some of my social media. It is proving to be a very helpful tool to allow me to get what I want done, and done quickly, and for free! All wonderful things. 

I can imagine using Canva.com for lots of things outside of social media: 
  • Birthday cards 
  • Invitations 
  • Thank you notes + e-mails 
  • Sale banners for your online store 
  • Tags for your kid's lunch box
  • Electronic love notes for your special peeps
  • Facebook banners
  • Sorry for being a knucklehead note 
  • Garage sale flyers  
The list goes on... and on... 


Above are a few images that I created (in no time at all!), one of which I am going to add to my personal Instagram feed, because I am now using my business Instagram account more frequently than my personal one. Wearing the entrepreneur hat LOTS lately!  If you are reading this, follow @e4interiordesign on Instagram + check out canva.com for creating your own custom images. 

Make time to do something creative today! 

Cheers, 

Saturday, October 25, 2014

DOLLAR STORE DYI SUPER HERO


Since we are now less than a week away from Halloween, I figured that I would reveal my creative and affordable costume solution that I have created for Charlie. The best part is it's unique and most of the supplies came from The Dollar Store! 

It all started with the blue cape. When I realized that Superman did not have a blue cape and all he kept talking about was wanting to be Batman. Avoiding a mini-melt down from the 2 year old, my creative mom-mind when into full effect, and together Charlie and I created our own super hero: 
 Super Mattei (our last name) Man!
 Super mom moment for me, it worked! He has been telling everyone about Super Mattei Man. Most people have no idea what he is talking about and probably think his name is Matthew! Oh well, it's our little super hero creation and Charlie is taking his new roll very seriously. We have even had a few dress rehearsals. 
So fast he is almost flying. 

Anyway, here are the supplies and associated costs all at the Dollar Store, except for the Velcro: 
Blue Cape ($1)
Red Duct Tape ($1 each roll)  + Blue Painters Tape ($1) 
 
Large Foam Sheets ($1) + Glittery Foam Sheets ($1)
Packet of Felt ($1) + Sew-On Velcro ($2.99 @ JoAnn's) 
Glue Gun Sticks ($1)

The other items I already had at home; glue gun, scissors, and a white mask left over from last Halloween.  I searched my trusty friend, Pinterest, for some inspiration images, and went to town! 
A few sketches, wine, and hot glue and I created a fun, unique, and special custom for my little super hero’s first real trick-or-treating adventure. No sewing required thanks to duck tape and hot glue. So easy + so cheap =  my kind of DYI. 

 I have bunches of left over supplies, so I have been thinking I may add a shield of some sort by Friday, or who knows, maybe I will make a Super Mattie Mommy costume!?!

Happy Halloween + safe Trick-or-Treating! 
Cheers, 

Tuesday, June 7, 2011

The Wonderful World of Etsy

I think one of the best parts of Etsy is that artists can promote each other through creating Treasuries. I have made a few, but mostly they have gone relatively unnoticed, some others get TONS of clicks and comments right away. No matter what their popularity, creating and being part of another Etsians treasury is fun. There are SO many talented, creative people creating amazing things. Here is a rainbow of treasuries that I love!

RED
http://www.etsy.com/treasury/4de6ee1cd7268eef7a424bb7/red-accents?index=66

ORANGE
http://www.etsy.com/treasury/4deec3c7bdf98eef3ae6d7cf/moon-spoon-loon-etc?index=46

YELLOW
http://www.etsy.com/treasury/4de7bb7fab576d91354b4ea7/sun-shining-summer?ref=pr_treasury

GREEN
http://www.etsy.com/treasury/4ded2f01d4956d91b695a389/secret-garden?index=13

BLUE
http://www.etsy.com/treasury/4dee8e93118b6d91fb293677/classic-meets-whimsy?index=6

VIOLET
http://www.etsy.com/treasury/4ded4711ac736d91d160968d/caribbean-blue-and-purple-peacock?index=237

Enjoy!

Saturday, January 1, 2011

Driftwood Christmas Trees

Recently I was creating jewelry displays for a craft fair. I made them out of drift wood, dowels, and rectangular drift wood bases. I had extra supplies left, and being that I was (still am!) in the spirit this holiday season, I decided to fashion a few Christmas tree decorations that are inspired by the sea and made from the left overs.

I know it is a little late, but I figured that I would share the process and some images of the final product. The supplies are pretty simple:

  • A power drill
  • A 3/8" wood drill bit
  • 3/8" Dowel
  • Wood Glue
  • Sand paper
  • Drift wood in a variety of sizes
  • A drift wood rectangular base (or a 2x4)
  • A decorative star or snowflake


When selecting pieces of drift wood for the body of the tree, select a variety of sizes. The trees that I made were approximately 16" to 18", and for a tree this large it required 12-14 pieces. It is good to select additional pieces in case they split when drilling them.

Place a solid piece of scrap wood under the drift wood pieces while drilling them. Drill through each drift wood piece. Using sand paper clean up the edges of where the drill broke through.

Drill a hole about 1/2" deep on the base wood. Using a small amount of wood glue, fasten the dowel vertically in the base. Allow the glue to dry.

Arrange the drift wood pieces in the order from the bottom of the tree to the top. Start sliding the drift wood pieces on the vertical dowel. I would not suggest using glue at this time, so that you can decide and adjust the branches of the tree. There are two ways of putting these drift wood trees together; first with the branches in a line and evenly spaced on the dowel or as shown in the image below....

...stacked directly on top of each other and all at different angles. This is another reason why you should hold off on using glue on the drift wood pieces - I actually opted to not use glue at all so that I can adjust the trees as I need.
Finish off the top of the tree with a star or snowflake ornament. I purchased these laser cut snowflakes from Crate & Barrel. Add your own color or decoration to the top of the tree.
All in all a pretty easy, reclaimed, rustic, decoration inspired by the sea! Enjoy!

Monday, November 1, 2010

Mothers; inspiring and creating a sense of home...

Recently, I have been reflecting on motherhood. Not so much for me, as a mother (whenever that may be), but how mothers create and foster a strong sense of 'home'. Unfortunately, in mid October, my husband and I, with many of his family members watched bedside as his sweet, sweet grandmother passed away. She was surrounded by her loving husband of 68 years, 3 out of the 5 of her children, a son-in-law, a few of her grand children and their spouses, and a yet-to-be-born great-grand child, (my niece!-more on that in December). There was so much love around her when she passed, there was little chance of it being a difficult passing. It was an emotional day, but I am so glad I was there to support my husband and his family.

A few short days later, my wonderful sister-in-law, Marisa, gave the eulogy at the funeral. She recollected how Grandma Sullivan was the glue that kept their family together, she created a HOME for all of the generations of her clan. She was famous for always feeding her family and particularly tempting the little ones in the family with sweets. Either way, through actual sweets or just her sweet personality, she helped to welcome, love, and create a sense of home. Marisa referenced how she was creative, with a studio in her renovated garage, welcoming in all the family members to paint, create, or just find any way to express themselves through art. In fact, there will be a piece of Grandma Sullivan's art in my new niece's nursery. She also noted how one of Grandma Sullivan's daughters whispered in her ear before she passed "Thank you for being a wonderful mother to all of us." What an amazing feat to be the mother of five, grandmother of eleven, and great-grandmother of nine! She truly was a wonderful grandmother and mother to so many. When my grandmother passed two years ago, I said to Grandma Sullivan, "I do not have any more grandparents, can you adopt me as one of your own?" She graciously accepted both verbally and truly. I always felt like one of her "kids" even after only knowing each other for three short years.


All of these thoughts and experiences, could not help but illuminate the links between the home and motherhood. When I created this blog, I did not intend on posting things of this nature, but I guess life helps to dictate our thoughts and connections. Motherhood is so directly linked to the title of this blog - mothers inspire, mothers create, and mothers are often times our home - our warm, safe place.

When I think of my own mother, she will be able to spoken of in the same way that Grandma Sullivan was; bringing the family together, loving, caring, and offering a space to be creative and to foster creativity in family members and friends that come into our home. My mothers art is all over the house I grew up in and in my new home with my husband. I believe that it is a syncronistic thing to be lucky enough to have more than one strong, creative, loving, female role model, that have influenced me and will continue to influence me as I embark on motherhood. I truly feel blessed.

Thank you to all the wonderful mothers that this description relates to! Thank you to all the wonderful mothers in MY life; Momma Lizzie, Grammy, Grandma Sullivan, Marty, Susan, Grandma Mattei, Aunt Betsey,....the list goes on and on! Like I said, I truly feel blessed.

Wednesday, August 25, 2010

Here goes....


INSPIRE. CREATE. HOME.


Three words that capture what I hope this blog will become. Inspire. Create. Home. I hope to inspire people with words and images. Share my words and the words of others to inspire change in day to day life, courage to create, power to move forward, and to motivate both you and me to LIVE LIFE!


Through these words and images I hope to encourage creation. As a third generation artist, creating art of many different forms has always been my outlet. I find so much joy in creating - sometimes there is not enough time for all that I want to do! I have been lucky enough to translate my love for creating into my career as a designer, and now, after FINALLY completing graduate school, into my hobbies that I now have time for.


Creating is a constant learning process. It is an outlet to release and discover. I hope my blogging and images, help inspire, encourage creation and discovery, and help you create "home"....whatever that may be for you. Slainte!